Table of Contents
Auditing Calibration of Plug Gages
 I recently performed an internal audit for a client who has been ISO 9001 registered for several years. During that time they had multiple external auditors… and NONE of them ever asked about the calibration of their approx. 200 plug gages (plain “Go/NoGo” plug gages and threaded plug gages)!!! The auditors simply ignored that these gages were used for inspections!
While there are several different types of gaging tools, here's a quick tutorial on how to audit the calibration of the most common plug gages.
The Disassembly of Plug Gages
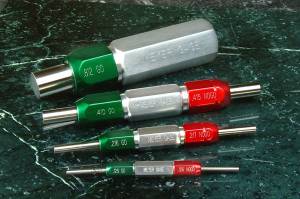
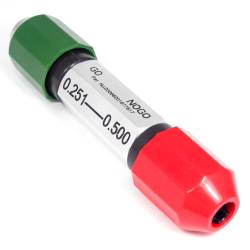
 The VAST majority of plug gages that I’ve seen consist of a handle (the middle piece) with a removable plug gage on each end (hence “Go/No Go gages”) - and often have two different end colors (Green for “Go” and “Red” for “No Go”).
  As you can see from the image to the left, these gages are easily removed from the handle (e.g., for replacement when worn). Since these gages can be removed from the handle… as shown in the image to the right, a calibration status label on the handle is meaningless.
So how can auditors identify individual gages in order to verify their calibration status?
While the gage would need to be removed from the handle, a “good” auditor will verify this unique identification so as to later confirm metrological traceability. While some companies simply place a calibration status label on the plug gage handle, “good” auditors will quickly dismiss any assertion that calibration of the gages is linked to the handle (Yes. I’ve actually seen companies try this… unsuccessfully).
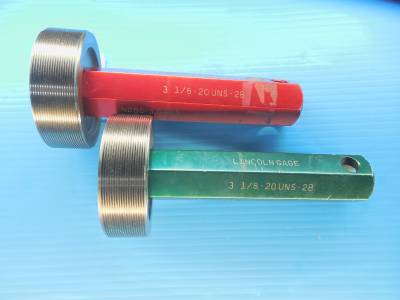
While some threaded and non-threaded (plain) plug gages are identified with serial numbers… others have no unique identification at all. The example below is typical… identifying technical details about the gage, but nothing unique to that specific gage.
Aware of this issue, many “good” calibration labs will work with their customers to assign and add a unique identification to each plug gage lacking a unique serial number. While unique identification can be etched onto the gage, there are other quicker & easier ways to address this; such as using a “Solvent Resistant Ink” and a couple of inexpensive rotating alpha numeric rubber stamps (with 1/16” or 1/8” character heights). For example: https://www.durable-tech.com/blog/bid/95129/Epoxy-Ink
Personally, I’d give preference to Durable Technologies product #6459 “One Part Epoxy Ink” (about halfway down the page linked below) simply BECAUSE it is certified for United Launch Alliance (ULA) for ULA 5-79055, Rev. C (so if the company gets any ULA work requiring this type of part marking, you’ll already be covered). https://www.durable-tech.com/marking/industrial-inks
Verifying calibration status
ISO 9001:2015 (and AS 9100:2016) both state:
7.1.5.2 Measurement traceability
When measurement traceability is a requirement, or is considered by the organization to be an essential part of providing confidence in the validity of measurement results, measuring equipment shall be:
b) identified in order to determine their status;
Some auditors (and companies) have historically interpreted this to mean that each instrument must have a calibration status label. While this is the most ideal approach for informing users of when their instruments are due for calibration and informing them of any calibration limitations, it's not actually required.
There are many instances where items such as gage blocks, pin gages, feeler gages, radius gages, precision mass sets, etc. are too small or it is impractical to place a calibration status label directly onto the device. In many cases these items are stored in a designated container (e.g., gage blocks, pin gages, precision mass sets) or in a suitable protective case (e.g., feeler gages, radius gages).
However, there are some devices that are generally unsuitable to store in a consistent designated protective case. A common example is the ASTM Class 6 & 7 cast iron masses (previously NIST Class F masses). These masses (weights) are normally identified by a unique number, which links each specific mass to its calibration record. The same situation exists for the many different types of plug gages.
Verifying Calibration Recall
With the gages now associated with their calibration records, the auditor can now verify that they're included in a calibration recall system (to ensure that they're calibrated at “specified intervals”.
7.1.5.2 Measurement traceability
When measurement traceability is a requirement, or is considered by the organization to be an essential part of providing confidence in the validity of measurement results, measuring equipment shall be:
a) calibrated or verified, or both, at specified intervals, or prior to use, against measurement standards traceable to international or national measurement standards; when no such standards exist, the basis used for calibration or verification shall be retained as documented information;
Instruments Found Out-of-Tolerance (OOT)
ISO 9001:2015 (and AS 9100:2016) both state:
The organization shall determine if the validity of previous measurement results has been adversely affected when measuring equipment is found to be unfit for its intended purpose, and shall take appropriate action as necessary.
While this requirement does not require a record for compliance, if individual plug gages aren't uniquely identified, it is unlikely that the company is compliant with this requirement.


